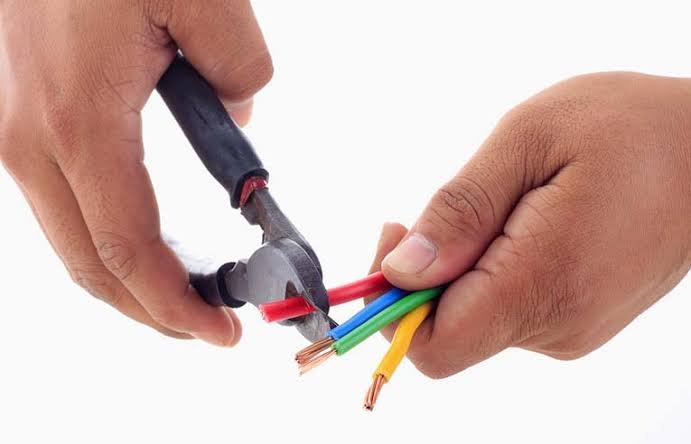
Cutting an electrical cable sounds like one of the simplest jobs on an installation site. Measure the required length, place the cable in the cutter, make the cut, and move on.
But experienced electricians know that a clean cable cut is more important than it first appears.
A cable that has been cut poorly can have crushed conductors, distorted insulation, damaged strands, or a deformed cable end. These problems may not always be obvious immediately. They can, however, make stripping, crimping, termination, and final installation more difficult.
The good news is that most cable-cutting problems are preventable. With the right preparation, a suitable cutting tool, and a little attention to technique, you can produce clean cuts without unnecessarily damaging the conductors.
Why Does a Clean Cable Cut Matter?
The purpose of cable cutting is not simply to separate one length of cable from another. The goal is to create a clean, usable cable end that is ready for the next stage of installation.
When conductors are damaged during cutting, the consequences can appear later.
For example, individual strands in a stranded conductor may become flattened or cut unevenly. A solid conductor may become distorted. The insulation may be compressed or torn.
These issues can make it harder to strip the cable correctly or achieve a reliable terminal connection.
A clean cut gives you a better starting point for everything that follows.
Start by Identifying the Cable
Before reaching for the cutter, take a moment to identify what you are cutting.
Cable construction varies considerably. You may be working with solid conductors, stranded conductors, flexible cables, multicore cables, or cables with different insulation and sheath materials.
The conductor material also matters. Copper and aluminium, for example, have different characteristics and should be handled according to the appropriate tooling recommendations.
Check the cable size and construction against the cutting capacity of the tool you intend to use.
Never assume that a cutter suitable for one cable is automatically suitable for another simply because the outside diameter looks similar.
Choose the Right Cable Cutter
Using the correct cutter is one of the most important steps in preventing conductor damage.
Cable cutters are designed with particular cutting geometries and capacities. The right tool should allow the cable to be cut cleanly without excessive crushing or deformation.
A tool that is too small for the cable may require excessive force. This can make the cut uncomfortable for the operator and may damage the cable.
On the other hand, using an inappropriate heavy-duty tool for a delicate cable can also produce poor results if the cutting action is not suited to the cable construction.
The manufacturer’s specified capacity should always be considered before cutting.
Measure Twice, Cut Once
It is an old workshop saying, but it still applies.
Before cutting, confirm the required cable length. Consider whether additional length is needed for routing, stripping, bending, termination, or future adjustments.
Once a cable has been cut too short, there is no tool that can put the missing length back.
Accurate measurement also reduces unnecessary handling and repeated cutting, which can save both material and time.
Position the Cable Correctly
Once the correct length has been established, position the cable properly in the cutter.
The cable should sit securely in the intended cutting area rather than being placed at an awkward angle.
Avoid cutting with the cable twisted or under unnecessary tension. Allow the tool to do the work rather than forcing the cable sideways while cutting.
Correct positioning helps distribute the cutting force as intended by the tool design.
Let the Cutter Do the Work
One common mistake is trying to rush the cut.
Applying excessive force or using sudden, uncontrolled movements can result in a poor cut and may place unnecessary stress on the tool.
With a suitable cable cutter, use a controlled cutting motion.
For larger cables, a ratchet or powered cutting tool may be appropriate, depending on the cable and application. These tools can help apply cutting force progressively and consistently.
If a cable requires far more effort than expected, stop and check whether the tool is suitable for the cable size and construction.
Avoid Tools That Crush Instead of Cut
Not every tool that can physically separate a cable is suitable for producing a quality cable end.
Improvised methods or unsuitable cutters may flatten the conductor or compress the cable before completing the cut.
This is particularly problematic with stranded conductors. Damaged strands can reduce the effective conductor cross-section and may interfere with later termination.
The aim should be a clean shear action, not simply getting the cable apart.
Inspect the Cut End
After cutting, take a quick look at the cable end.
Check whether the conductor has remained intact and whether the insulation or outer sheath has been unnecessarily damaged.
For stranded conductors, look for broken, pulled, or severely distorted strands.
For multicore cables, check that individual cores remain properly positioned and that the cable structure has not been excessively compressed.
If the cut end looks damaged, don’t automatically continue to the next stage. Depending on the application, it may be better to recut the cable with the correct tool and technique.
Be Careful When Preparing for Stripping
Cable cutting and stripping are closely connected processes.
A clean cut gives the stripping tool a better starting point. But cutting should never be used as a substitute for proper stripping.
When removing insulation, use a stripping tool appropriate for the conductor size and insulation type. Avoid cutting into the conductor itself.
A nicked conductor may become a weak point, particularly when the wire is later bent or terminated.
Good cable preparation is therefore a sequence: measure, cut, inspect, strip, and prepare for termination.
Keep Cutting Tools in Good Condition
Even the right cable cutter can produce poor results if it is worn or damaged.
Regularly inspect cutting edges and moving components. Look for excessive wear, corrosion, looseness, or damage.
A cutter that once produced clean cuts may gradually become less effective.
If more force is suddenly required to cut a familiar cable, consider that a warning sign. The issue could be tool wear, incorrect tool selection, or a change in cable construction.
Maintenance should follow the manufacturer’s recommendations.
Common Cable-Cutting Mistakes
Several small mistakes can turn an otherwise simple task into a cable-preparation problem:
- Using a cutter beyond its specified capacity
- Cutting without checking cable construction
- Applying excessive force
- Cutting a cable while it is under unnecessary tension
- Using damaged or worn cutting tools
- Crushing stranded conductors
- Failing to inspect the cut end
- Using cutting tools to perform stripping work they were not designed for
Avoiding these mistakes helps protect both the cable and the tool.
Keynotes
A clean cable cut is the beginning of a good electrical connection.
The process does not require complicated equipment or elaborate procedures. It requires the right tool, correct positioning, controlled technique, and a quick inspection after the cut.
Most importantly, don’t judge a cable cut only by whether the cable has been separated. Look at the condition of the conductor and cable end afterward.
When the conductor remains intact, the insulation is properly maintained, and the cable end is ready for the next stage of preparation, you know you’ve done more than simply make a cut—you’ve prepared the cable for a reliable installation.
In electrical work, small details often have a big impact. A clean cut is one of those details worth getting right every time.